
Sprunksters
Sprunksters
Sprunksters
What is Sprunksters?
The first thing to notice in Sprunksters is the row of seven gray figures against a textured sky. They do not need to be filled all at once. A figure becomes part of the arrangement when you carry a sound tile from below the stage and drop it onto that figure. The design of the tile gives you a visual way to remember the part later, while the change on stage tells you where it landed. Listen to the loop before adding the next tile. It is much easier to tell what a new layer contributes when the arrangement has only one or two parts.
The lower tray in Sprunksters uses two rows with a mix of headgear, faces, and other shapes. Look at the silhouettes rather than trying to memorize their colors, especially when several tiles are close together. The upper strip serves a different purpose: six add-on squares in this build say TBA. They are not a checklist, and you do not have to open any of them to mix with the tray below. The normal stage has bright artwork, but the game also includes an optional horror scene. Avoid the black hat at the far right of the lower row if you want to stay with the brighter experience.

What you can change
- Seven places make the Sprunksters lineup easy to read even when you add several sounds. Try building from the left edge toward the center so there is an obvious order to the changes you made. If you are testing a single pair of parts, there is no disadvantage to leaving the other figures empty. A sparse arrangement gives each sound room to stand out, and the empty figures make it easier to choose your next target without accidentally dropping onto someone already playing.
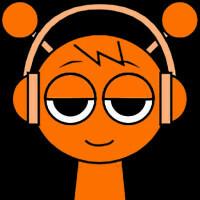
- The illustrations in Sprunksters are easy to spot against the rough texture of the background. The orange earphones, flower-covered head, and blocky display faces have distinctly different outlines. When a tile lands, check that the gray figure changes before reaching for another one. A drop between figures may not place a part, and holding the mouse button as you move past a figure does not by itself finish the action. Move over the body and release there.
- The circular arrow in the upper right lets you clear a Sprunksters lineup and hear the difference when you start over. Use it after a short listening experiment, rather than treating a reset as a penalty. If the last mix was hard to untangle, repeat just its first sound and pick a different second tile. You can compare two clear versions of an idea this way instead of trying to remember what changed in a full stage.
- The optional change of atmosphere is separate from the ordinary sound experiment. The black hat is not needed to fill an empty place or complete a track. If startling imagery is not for you, keep using the other tiles and leave the hat where it is. The guidance here is for the regular stage, not a promise that every add-on is finished or that a particular set of sounds unlocks a bonus.
How to play Sprunksters
- Press the page's play button and wait for the embedded player to finish opening. Select the green flag on its title image. Once the gray performers appear in the center and the lower tray is visible, choose the orange sound tile in the upper row of that tray. Drag it to the first gray figure. Release over the figure itself rather than near the floor or between two heads. If it does not take, aim farther inside the body on the next try.
- For a first Sprunksters duet, let the first loop run on its own long enough to notice where it leaves a gap. Drag another tile to a second performer and listen again. The two parts can be heard together, so look for a change in texture rather than merely a louder result. If they feel crowded, start again with one part and try a different partner. Make one change at a time so you can tell which tile altered the sound.
- Build an arrangement you can remember without taking notes. For example, put a part you want to keep on the far left, use the next place for a contrast, and leave the center empty until you know what is missing. The figures are a visual record of what you have already tried. If a tile does not appear to place, check whether the intended spot is still gray and whether you have chosen a tile from the main tray rather than one of the marked add-on squares.
- When you are ready for a fresh Sprunksters mix, use the circular arrow and wait for the stage to return to gray. Then put a different sound into the first place and listen for it by itself. You can stop after a brief comparison or repeat with a new pair. This is a small arranging exercise you can do without following a score, completing a timed challenge, or relying on a save function. Leave the black hat alone to keep the session in the default scene.